Rescue magic and the dark art of Mechanical Advantage
If you play on rivers long or hard enough, you might end up with your boat pinned, or come across other carnage on the river from other groups. I can think of many times I’ve seen boats stuck around objects that seem to jump out and get the unsuspecting paddler. When this happens, to my surprise, they love to try and build the most crazy system to retrieve it. But they often get it all back to front and inside out.
We all know the acronym K.I.S.S (Keep it Simple and Safe), but we also love ropes, knots and pulleys. Any chance to create an elaborate system we relish in, but this is where the dark art of MA (Mechanical Advantage) starts to create havoc amongst paddlers who lack the wizard like skills of pulling boats off their unidentified object. I’ve written this article to shed some light on this subject and to try to dismantle the dark art, which I hope will help fellow paddlers pass awards and retrieve friends boats looking like a MA wizard.
What is MA?
In its simplest form, it is a force multiplier! A mechanical advantage system is one in which the pulling force exerted by the rescuers is less than the load. Still confused?
Before we move onto the dark arts I want to go through the simple and effective systems which often get forgot or neglected and can be a powerful weapon in your dark arts arsenal.
Boy Scout or Strong Arm method
This is not a true MA system, but can increase force applied to a load very simply and can be an effective solution. As a simple rule, an average person can pull a load with a force of 50kgs. Therefore, by putting 5 people on that rope, it can have a force of 250kgs. However, the problem with this is, as each person holds the rope and creates bends to get grip, each person’s direct input of 50kgs is reduced (picture A).
A
B
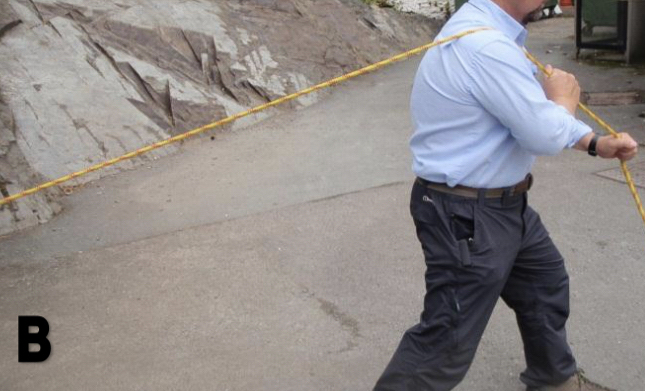
A single person can increase their force by adopting a different position (picture B), which can see forces of about 100kgs, but with this method only one person can pull on the load.
The Fan
This is a fan favourite of mine! It enables the Boy Scout method to be used by many, but still enables each person to exert their maximum force on the load without much loss in the pullers force. A simple knot that creates a loop (picture A) can be tied in the haul rope, then each person can attach their sling to it. This allows each person to adopt the best position, so there is no loss in force. If the line is already tensioned, then a simple rope grab with a prussic can be used to attach the fan (seen in picture B).
A
B
Vectors
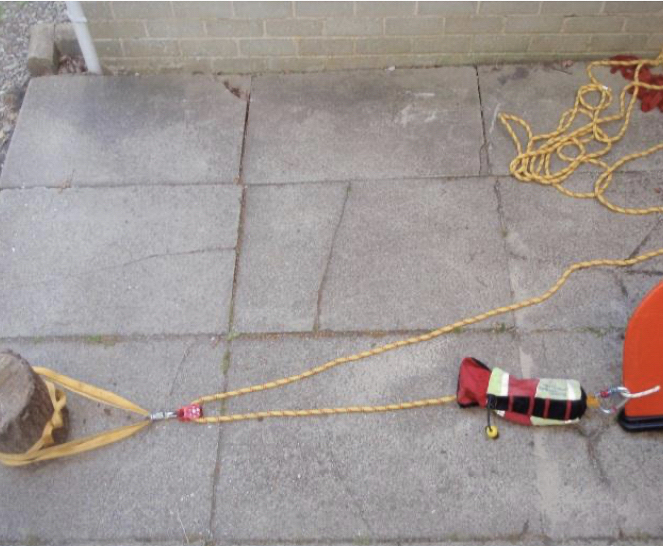
Once a line is tensioned, by pulling on the line at a right angle, it can exert a huge force on the load (and also on the anchor!). If pulling directly in the middle of a tensioned line, the load and anchor can see nearly 200% of the force applied. This method is an extremely effective solution and can be set up quickly. It can also be applied to all of the hauls later in this article.
Vector pull
Knots for anchors
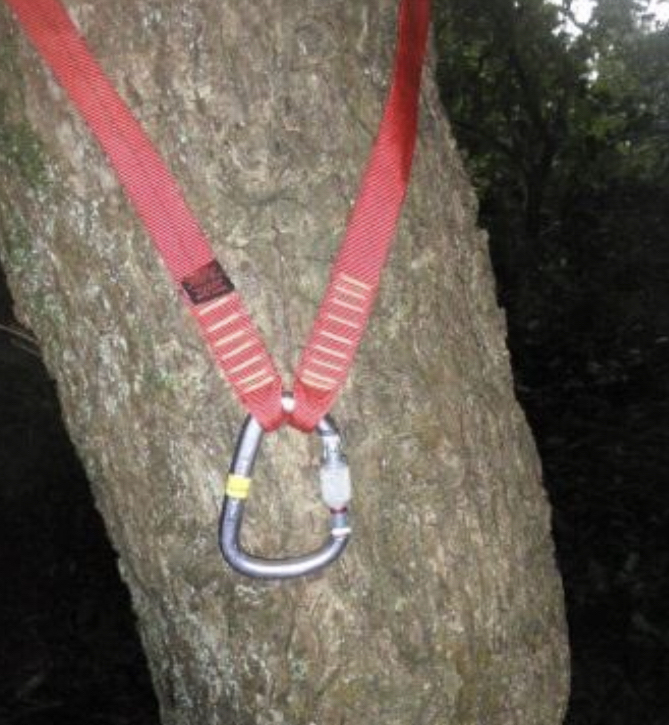
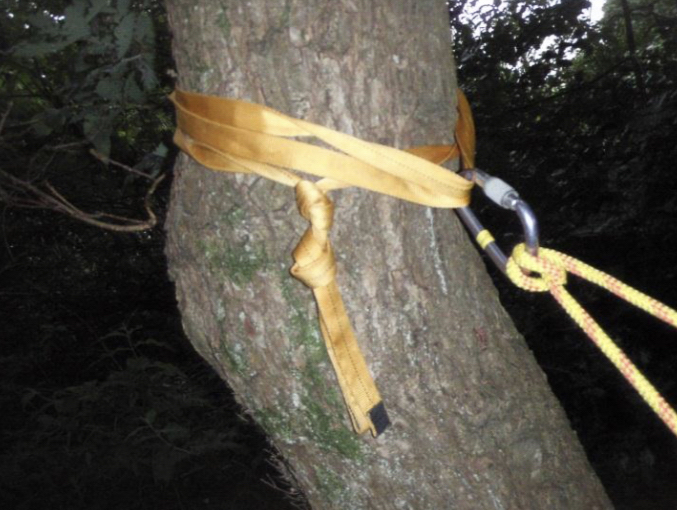
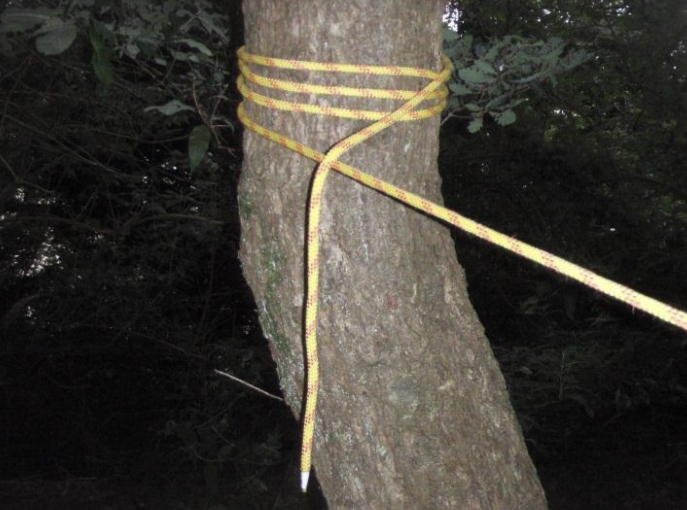
We have seen that in the vector pull, the forces seen on the anchor and load can be very large. Therefore the anchor
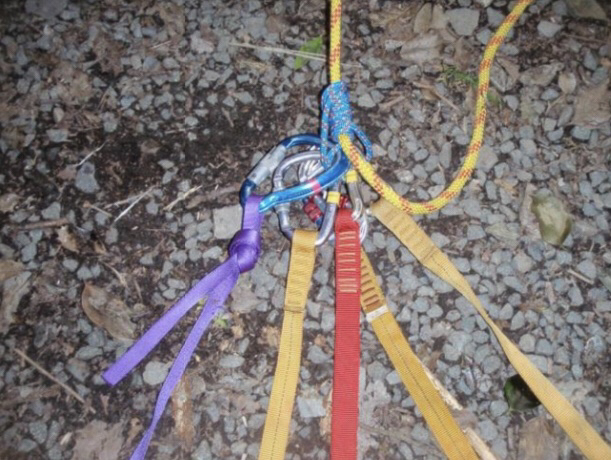
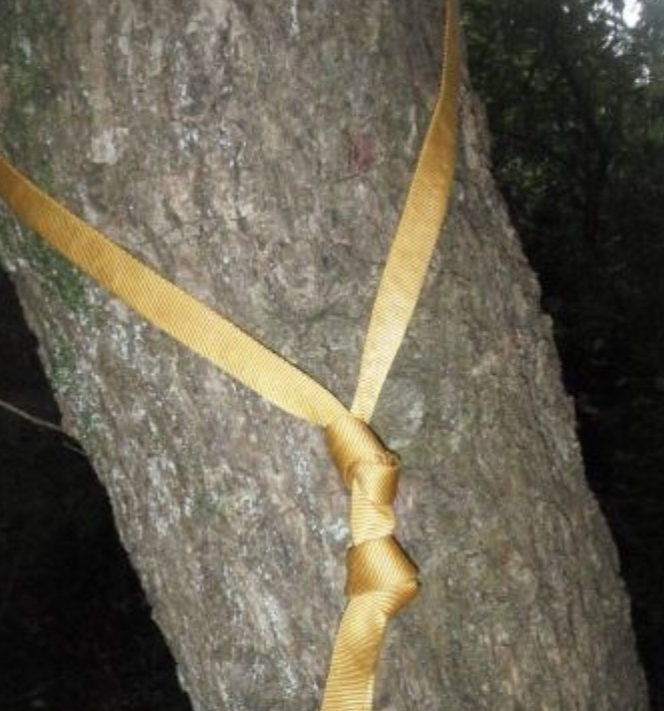
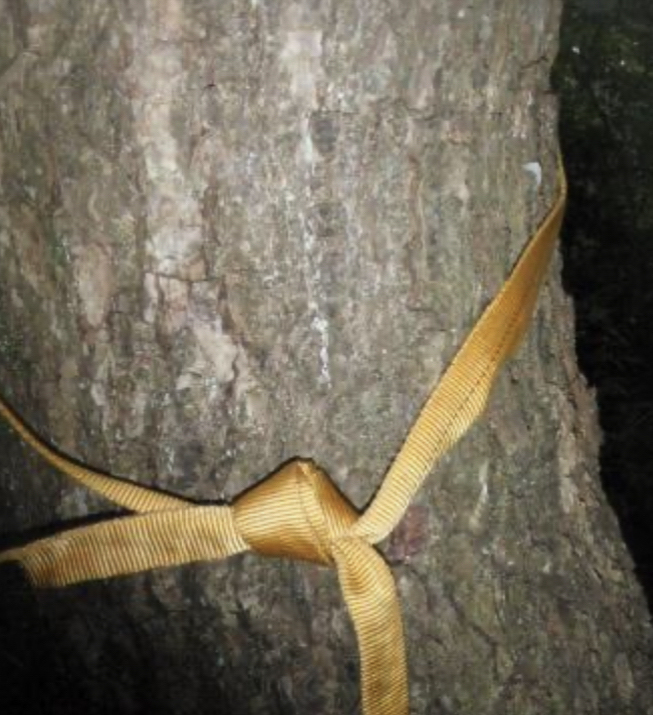
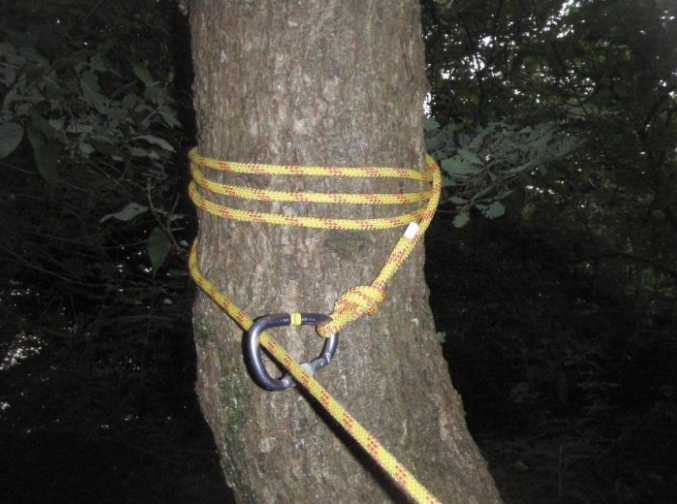
you build must be able to handle this forces. Below I have shown the different types of anchors, all using an open long tape sling. Remember! A not neat knot is a knot not needed! i.e. dress your knots!
Tying off your boat
There are a couple of options here – the ‘Italian hitch’ & the ‘No-Knot’
A
B
A standard Italian hitch allows the rope to be taken in as you haul your boat (see picture A). Italian hitches can be tied off very easily (see picture B).
C
D
The No-knot is my favourite as it requires no anchor building. When you end up swimming to shore with your swim line in hand, you generally don’t have time build a lovely anchor, so this enables you to anchor you boat down very quickly (see picture C & D above). It is sometimes called a full strength tie off because it has no knots in it which weakens the rope. It’s also not in a tight bend like in the Italian, which again can put more force on the rope. It can still be belayed in like an Italian so is very good for all its advantages, although it can be fiddly to take in.
The mystery pulleys part
Okay, this is the bit where most of us get excited and get our rope geek on – and the bit that is the dark art of MA. In this section I will attempt to give you a simple and effective system of calculating which pulley system you have made and hopefully give you some examples of different systems.
IS THIS PICTURE MA?
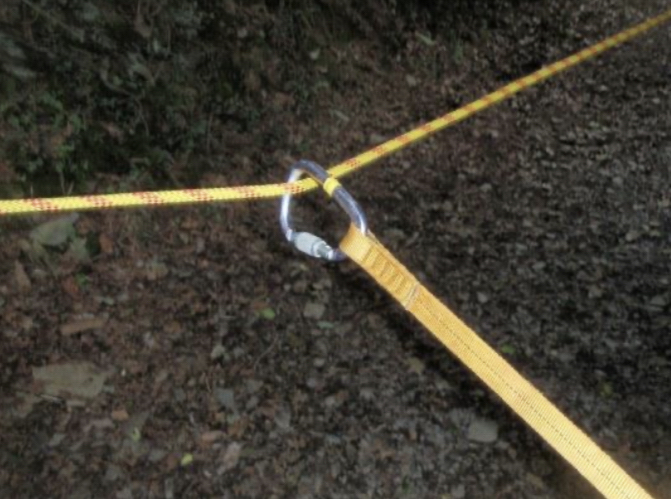
Commonly, a lot of people think that this picture shows a 2:1 MA system and it is why many people will calculate wrong when trying to work out harder systems later on. So the answer is no, this is not MA, in fact this is just a change of direction to your pulling force. This is good when limited space on bank so you can change direction of pull.
To be able to calculate and figure out MA pulley systems we can apply a simple rule which will stay through all systems: Pulleys attached to anchors do not move so no advantage is gained. Advantage is only gained when pulley moves!
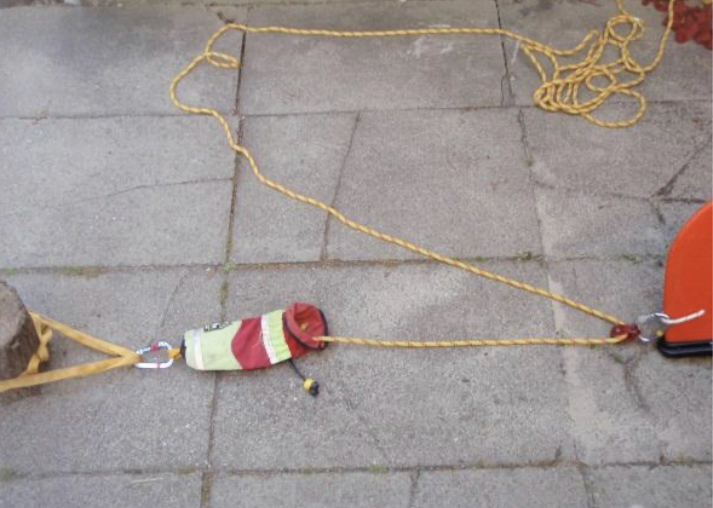
Is this MA?
The pulley is now attached to the load, so it will move as it is hauled, so is now no longer a change of direction. It has now become a 2:1 system.
So what does 2:1 mean? The key to understanding this is – moving the load 1m you will need to pull 2m of rope through the system. So a 9:1 will require 9 times the amount of rope for just 1 amount of movement on the load.
The T method
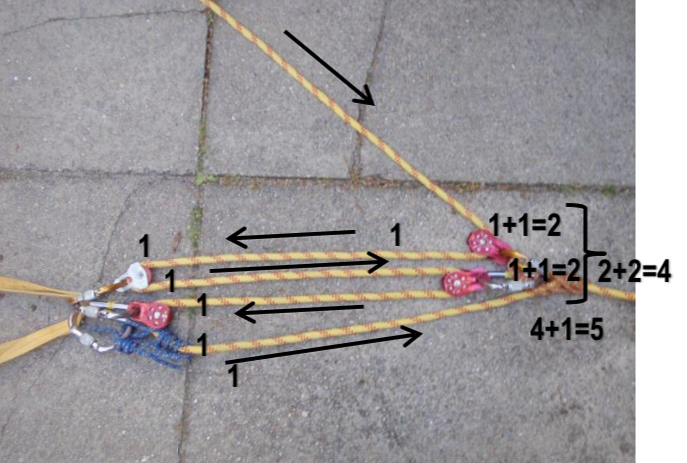
This is my go to method for calculating any pulley system and can be applied to all the systems below. Some people count the rope in a system to calculate the MA, but likely to not be accurate when the system becomes compound and complex. The T method works on simple, compound and complex systems, which I will illustrate below in the diagrams. The T stands for tensioned unit, a notional input force generated by the hauler.
So to use the T method, we must understand that if a load weighs 1 unit, to hold it there, the person hauling must also hold 1 unit on the other side as well. If each side of the pulley is now in balance, then the anchor will see both added together, which is 2. This is the key principle for using the T method, but you must remember the earlier rule of which pulleys add MA and which don’t (instead just change the direction of pull).
So what does it look like in a pulley system?
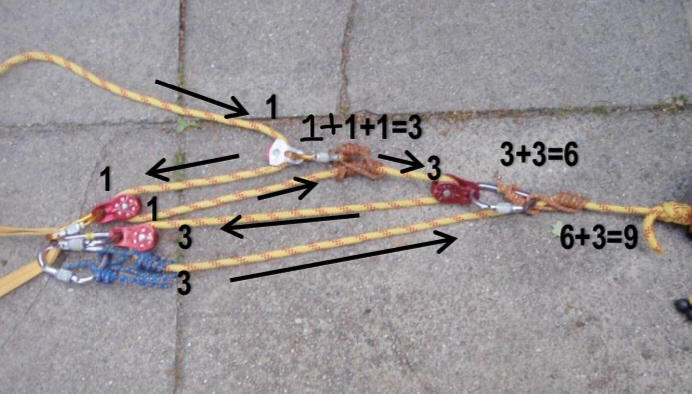
Simple internal 3:1 (AKA the Z-drag)
So one unit starts and enters first pulley. As it is a moving pulley, it adds – therefore 1 in 1 out = 2 at the knot. The 1 continues down to the anchor pulley, which does not move, so does not add MA – so the 1 moves through that pulley and moves down towards the knot where it meets the 2 from earlier. This adds to make 3.
The next two pictures show a close up of the Z Drag. It also shows one with a prussic instead of a knot. A key point here is to notice the prussic on anchor, which allows the progress of the haul to be captured.
Simple internal 5:1
Getting harder now…
However, if you apply the same T method principle and rule, it is easy to follow it through the system. When you get 2 pulleys that move at same point, they add together at the point it attaches to the load rope.
Simple internal 9:1
Can you see why this is a 9:1 system before looking at the picture below?
External Systems
If you have the boat secured with a swim line, you may need to build a system from that tied off line, rather than from the boat directly. This becomes an external system.
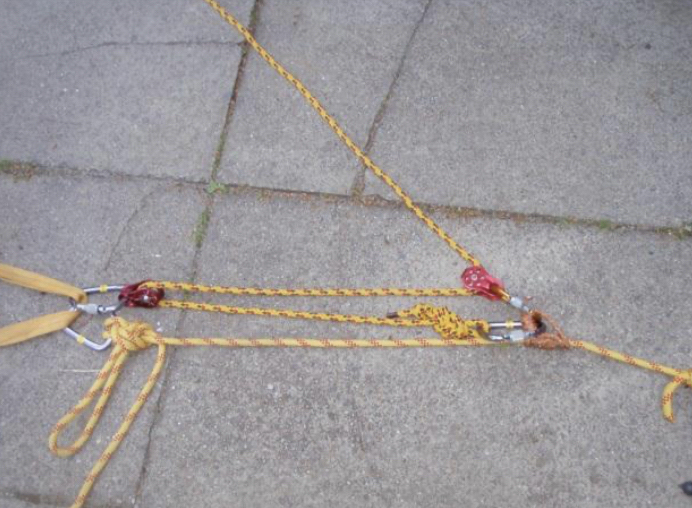
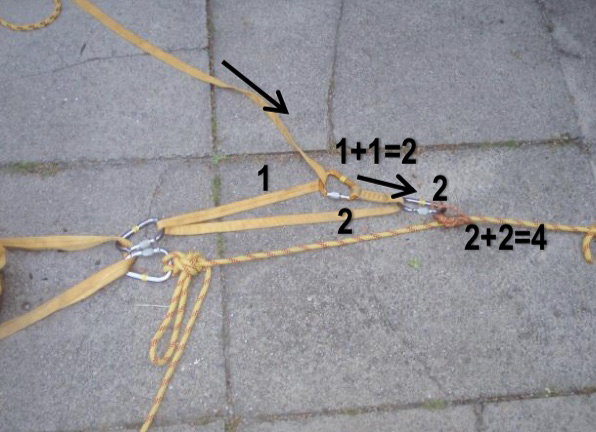
External 4:1 (AKA the clothes line or a 2:1 pulling a 2:1)
A
B
To turn this into an internal system, just remove the bottom rope.
The 4:1 is one of the best systems there is and I would generally always use this one as it is simplest to set up. It will give you as much force as you need for pulling a canoe or kayak. You can also create this with a palm sling (picture B) and no pulleys, which means less, or internally with one rope. It works like a clothes line, as you can reset it, which means no prussic to hold the capture. But the haul rope must be belayed in an via Italian hitch or no knot. If you put a pulley on the anchor, this system will not work. It relies on the friction created on the karabiner when under load. So as a general principle to all systems, if you haven’t got enough pulleys, then you always put them closest to the hauler or input force.
And finally – can you figure this one out?
I’m hoping that by now you have figured out the above picture as you are now a MA wizard and understand the dark arts of Mechanical Advantage. We must remember that the art is to keep it simple and start basic. I have only ever had to use pulley systems on Rafts which hold best part of 2 tonnes or more when pinned. All other boats came off with some of the basic systems. I’m hoping that this blog will help people to understand and ultimately be more confident with these systems on assessments and in personal paddling adventures. These skills will disappear if you don’t use them, so get a rope out and practice every now and then. These rope work skills also move across to other disciplines, so transfer is very easy – the principles stay the same, just the axis in which you’re hauling changes.